How to grow, harvest and store your own garlic
A concise guide to growing your own garlic

Garlic is a wonderful staple of the (not only) Mediterranean cuisine. Garlic has a number of proven and potential health benefits.
Garlic is easy to grow from seed - cloves, the individual segments of bulbs. Garlic is hardy, loves sun and well drained soil. Apart from weeding and watering it requires no attention and produces reliable results. It stores well and, depending on the variety, keeps a long time.
To be clear at the outset: This is how I grow garlic. It might not work for everybody. Timing especially, as several readers pointed out, does depend on your local climate. My garden is in the South of England.
Choosing garlic varieties
There are two main types of garlic: hardneck and softneck. I am growing a softneck French Mediterranean variety, which has been bread to suit the weather. This type of garlic is what my article is about.
Softneck garlic produces more but smaller cloves. Treated correctly, it stores for an exceptionally long time. Softneck garlic is also less likely to bolt (flower), which can produce bulbs that will not store well.
Only ever buy seed bulbs from a reputable supplier (online from a reputable grower or in your local garden nursery or centre). The varieties have been bread to suit the climate and are disease free. In following years you can use your own garlic for seed.
Planting garlic
I grow my garlic in raised beds in my no-dig vegetable garden. No dig means that there is no digging over. Once a year, around mid October to November, I apply a mulch from our own, homemade compost. This is all that is needed to provide fertile growing conditions.
The soil, where I am, is on the sandy side and therefore drains well. Garlic likes these conditions. If your soil is heavy, you should try to improve it using one of the methods that you have no doubt already researched. I am told that garlic dislikes acidic conditions but I have no first hand knowledge.
Timing is important. Garlic needs an initial spell of colder weather to grow well. Most garlic planting guides will tell you that you can plant any time from October to February. Personally I stick to an old tradition that says that garlic is planted on the shortest day of the year and harvested on the longest (give or take).
In practice, I usually plant a few days before the shortest day (21 December). This has served me well for several years now. With the breakdown of our climate, winters become milder and wetter. Cold temperatures occur later. There may be a benefit in holding off for a couple of weeks, which is something that I want to try next year.
One year I tried to plant earlier, in mid October, and the harvest was exceptionally disappointing.
How to plant garlic
These timings are entirely my own: By the time I am thinking about planting garlic, I already have my own harvest or bought bulbs. They will store well in a dark, cool, dry and reasonably well ventilated spot until they are needed.
Some time in October I weed the beds and apply a layer of mulch to the beds. The mulch comes from our own, homemade compost.
In a no dig garden, do not be tempted to dig the compost in. For an introduction to no dig gardening look to the website and books of Charles Dowding, who is an authority on the subject.

To plant, break your garlic bulbs into individual cloves. Gently! There is no need to remove the skins. Any skins that fall off go in the compost. Stick your trowel into the ground, pull the soil back gently, drop in a clove and cover. This is it. You do not need to water them in.
The cloves go in pointy end up and should be about 2½ cm deep, measured from the tip. Eye measure is sufficient. I plant my cloves around 15 cm apart in either direction. Some growing guides suggest that rows should be spaced 30 cm but I have found that my closer spacing works perfectly well.
How to grow Garlic
There is almost nothing to do during the growing season. Weed the beds and water during dry spells.
I have several water butts installed and use rainwater. This way, my water requirements are not a burden on precious resources.
One guide I have researched said that you should “not water once the bulbs are large and well formed, as this could encourage rotting”. By contrast, Mediterranean varieties, such as the one that I am growing, seem to respond well to heavy watering in the three months before harvest. Bear in mind that my soil does drain well.
I stop watering completely around ten days before harvest, unless we have very hot and dry weather. If it rains, so be it.
Whilst garlic does like it warm and sunny, the weather does not seem to make a huge difference. I have grown garlic in hot and dry years and during wet and dark periods. It did not affect the harvest that much.
If you are growing your garlic in a no-dig bed, there is no feeding that you need to do.
How to harvest Garlic
Garlic takes around half a year to be ready for harvest. Harvest, traditionally, is on the longest day of the year, around 20 June.
You know when your garlic is ready because the leaves have started to yellow and may flop over.
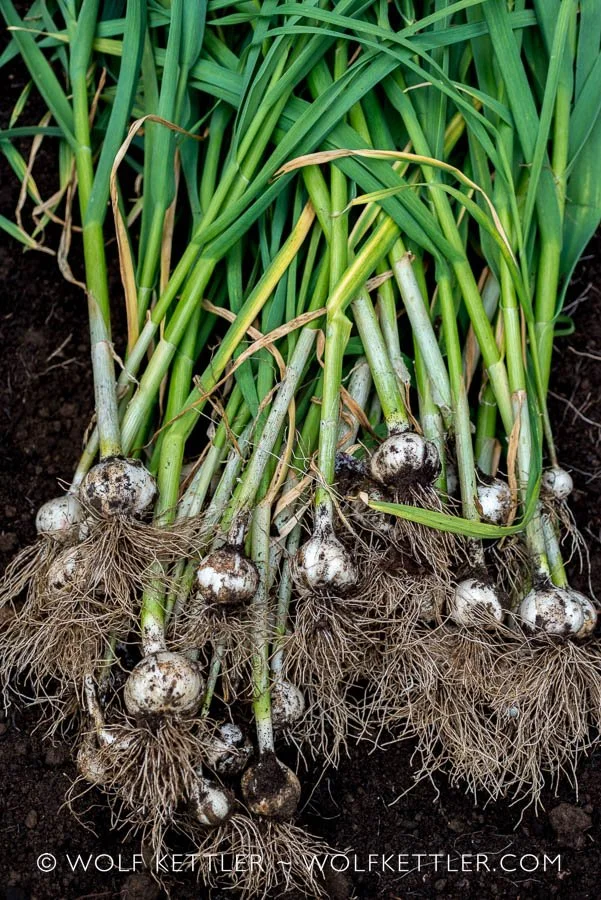
To harvest, insert your trowel gently into the ground a good distance from the bulb, use it for leverage and pull the bulb out. Be gentle. Rough treatment shortens storage life.
At this stage, do not cut off the leaves, do not trim the roots and do not brush the soil from the cloves. Leave them just as they have come out of the ground.
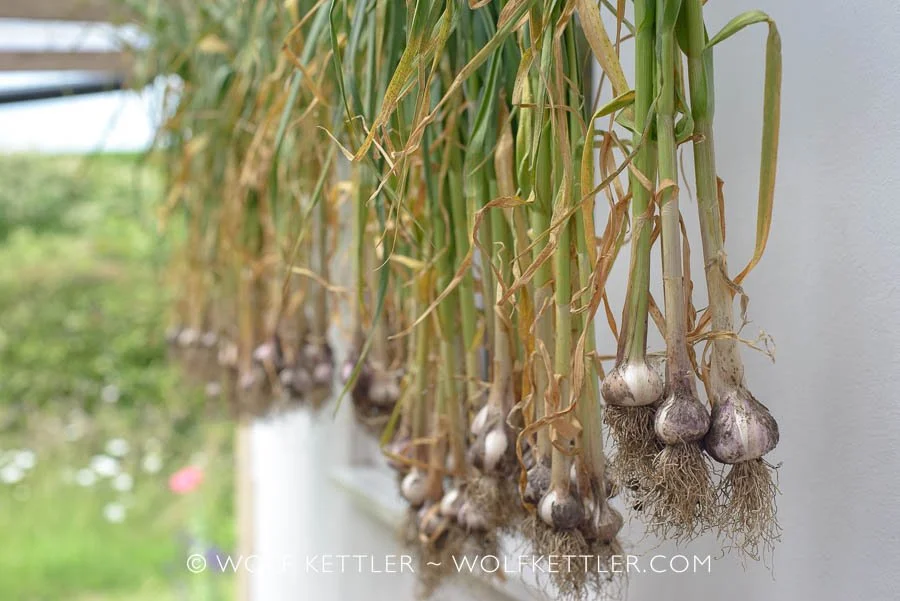
I then bundle the bulbs in groups of five and tie them together at the leaves. I have a very convenient transparent roof behind the house, where I hang my bulb bundles on the washing line, which lives there.
The bulbs stay there for ‘curing’ (drying) for at least a month. Aim to have them up until the leaves have become distinctly dry. This is a very important process, which affects how long your bulbs will store. After that, I bring them in the house.
Last year I did not have time to process the harvest after outdoor curing, as we were going away for two weeks. Instead, I hung them in the house in a spare room. I am thinking of using this method in future years because the results were greatly satisfying.
Important during curing are air circulation and protection from rain. Air temperature and humidity, in my experience, do not seem to matter much.
Storing Garlic
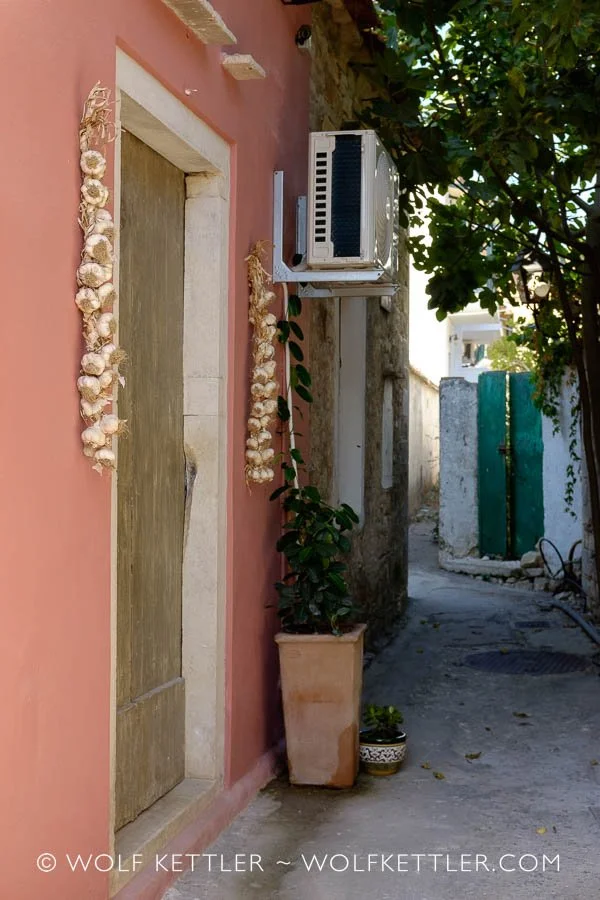
Garlic hung up in strings on the wall of a house in Mediterranean Greece, framing the front door.
After curing, you have options: You can plait the leaves for a traditional and very pretty display.
I find this a little too fiddly and trim off the leaves to around 2 cm of the bulbs and the roots. The bulbs then go in a wire basket in my larder on the floor. The larder is a separate room, dry, unheated and, owing to just one north facing small window, relatively dark.
Treated this way I have a ready garlic supply to last me until the next harvest. During the month or so of curing, I usually run out.
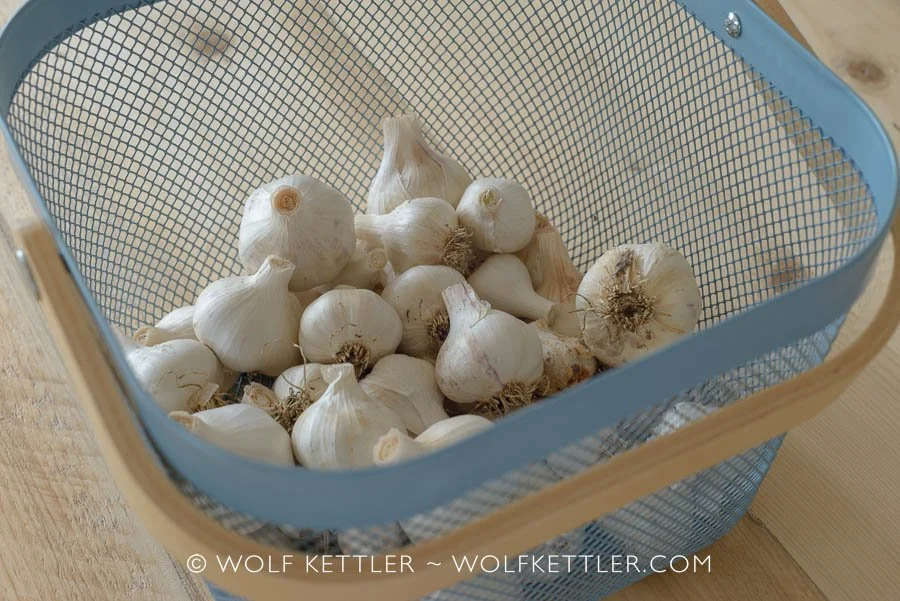
Cured and trimmed garlic, ready for storing in a dark, cool and well ventilated spot.